Solr Search Integration on Drupal
March 11, 2015
This post accompanies a talk I gave at the March 2015 UMD Drupal Users Group meeting. This is my penance for not providing slides during that talk.
Setting up Solr
This tutorial is going to assume that you're working in a UNIX environment. I'll be using a RHEL7 machine.
Solr is a Java application, so grab a Java Runtime if you don't have one installed already. There are a few different options for deployment. There's a standalone server that ships with Solr or you can deploy with Tomcat if you've got an existing Tomcat webapp strategy. We are going to use the standalone server.
Note: The Search API Solr Search module currently only supports Solr 3.x and 4.x, so we are going to roll with Solr 4.9.0, even though 5.x just came out.
First, let's go and download Solr 4.9.0 and extract it.
$ cd /tmp
$ wget https://archive.apache.org/dist/lucene/solr/4.9.0/solr-4.9.0.tgz
$ tar xzf solr-4.9.0.tgz
Great! Everything got extracted into /tmp/solr-4.9.0/. There's lots of interesting stuff inside, but we are mainly interested in ./example/.
Copy /tmp/solr-4.9.0/example/ somewhere less transitory. I like using /srv/ for this kind of thing, but you do you.
$ mkdir /srv && cp -r /tmp/solr-4.9.0/example/ /srv/solr/Setting up Solr to work with Drupal
The Search API Solr module contains configuration files to be used with Solr. Configuration for each Solr collection is held in the conf subdirectory. Let's download the module and move the configs into place.
$ cd /tmp && wget http://ftp.drupal.org/files/projects/search_api_solr-7.x-1.6.tar.gz
$ tar xzf search_api_solr-7.x-1.6.tar.gz
$ cp /tmp/search_api_solr/solr-conf/4.x/* /srv/solr/solr/collection1/conf/
We could start Solr by running:
$ cd /srv/solr && java -jar start.jarIf you're running CentOS/RHEL, make a systemd service script while you're at it to start/stop/reload the service by populating /etc/systemd/system/solrd.service as follows:
[Unit]
Description=Apache Solr Service
After=network.target

[Service]
ExecStart=/srv/solr/start.sh
Type=forking
PIDFile=/srv/solr/solr.pid

[Install]
WantedBy=multi-user.target
Make a /srv/solr/start.sh script that we can call on:
#!/bin/bash

SOLR_ROOT=/srv/solr
PID_FILE=$SOLR_ROOT/solr.pid

cd $SOLR_ROOT

exec java -jar start.jar >/dev/null 2>&1 &
PID=$!
echo $PID > $PID_FILE
Give start.sh the execute bit:
$ chmod +x /srv/solr/start.shEnable and start the service:
$ systemctl enable solrd
$ systemctl is-enabled solrd
enabled
$ systemctl start solrd
If you are running an OS that doesn't use systemd, you will want to fork a daemon calling /srv/solr/start.sh through whatever facility your OS uses to launch boot dependencies (sysvinit, upstart, etc...).
Note Ubuntu has used upstart for a few years, but has switched to systemd starting with Ubuntu 15.04 (Vivid Vervet).
Setting up Drupal
Module Installation
Install and enable the following modules:
Set up a Server
Like so:
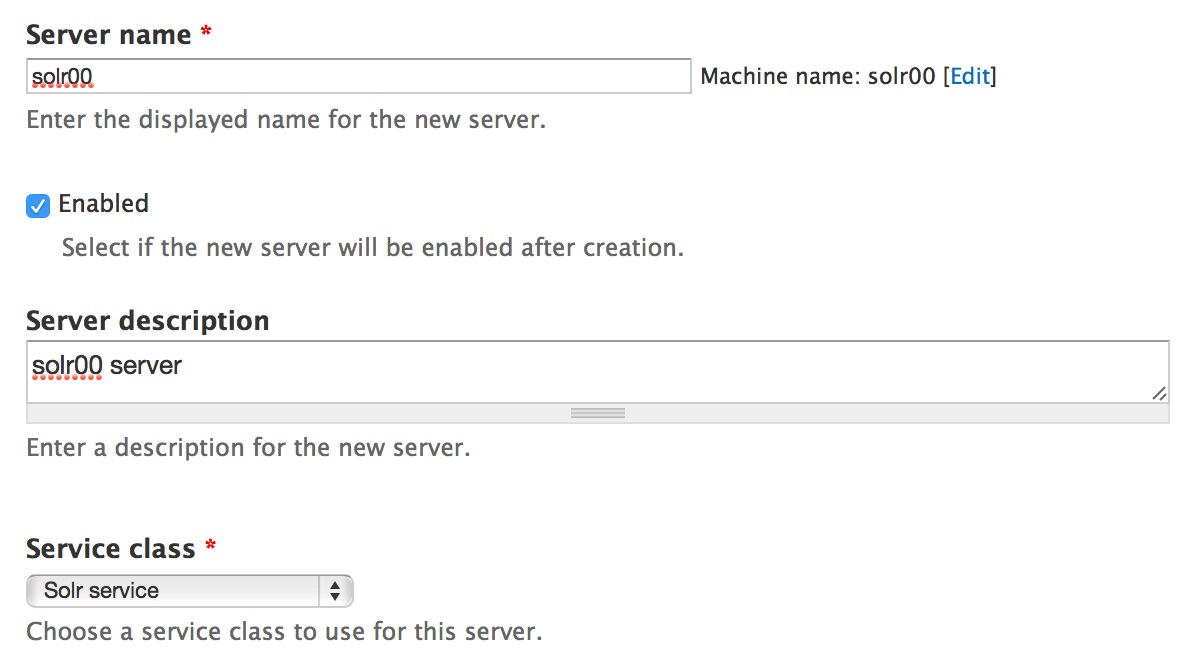
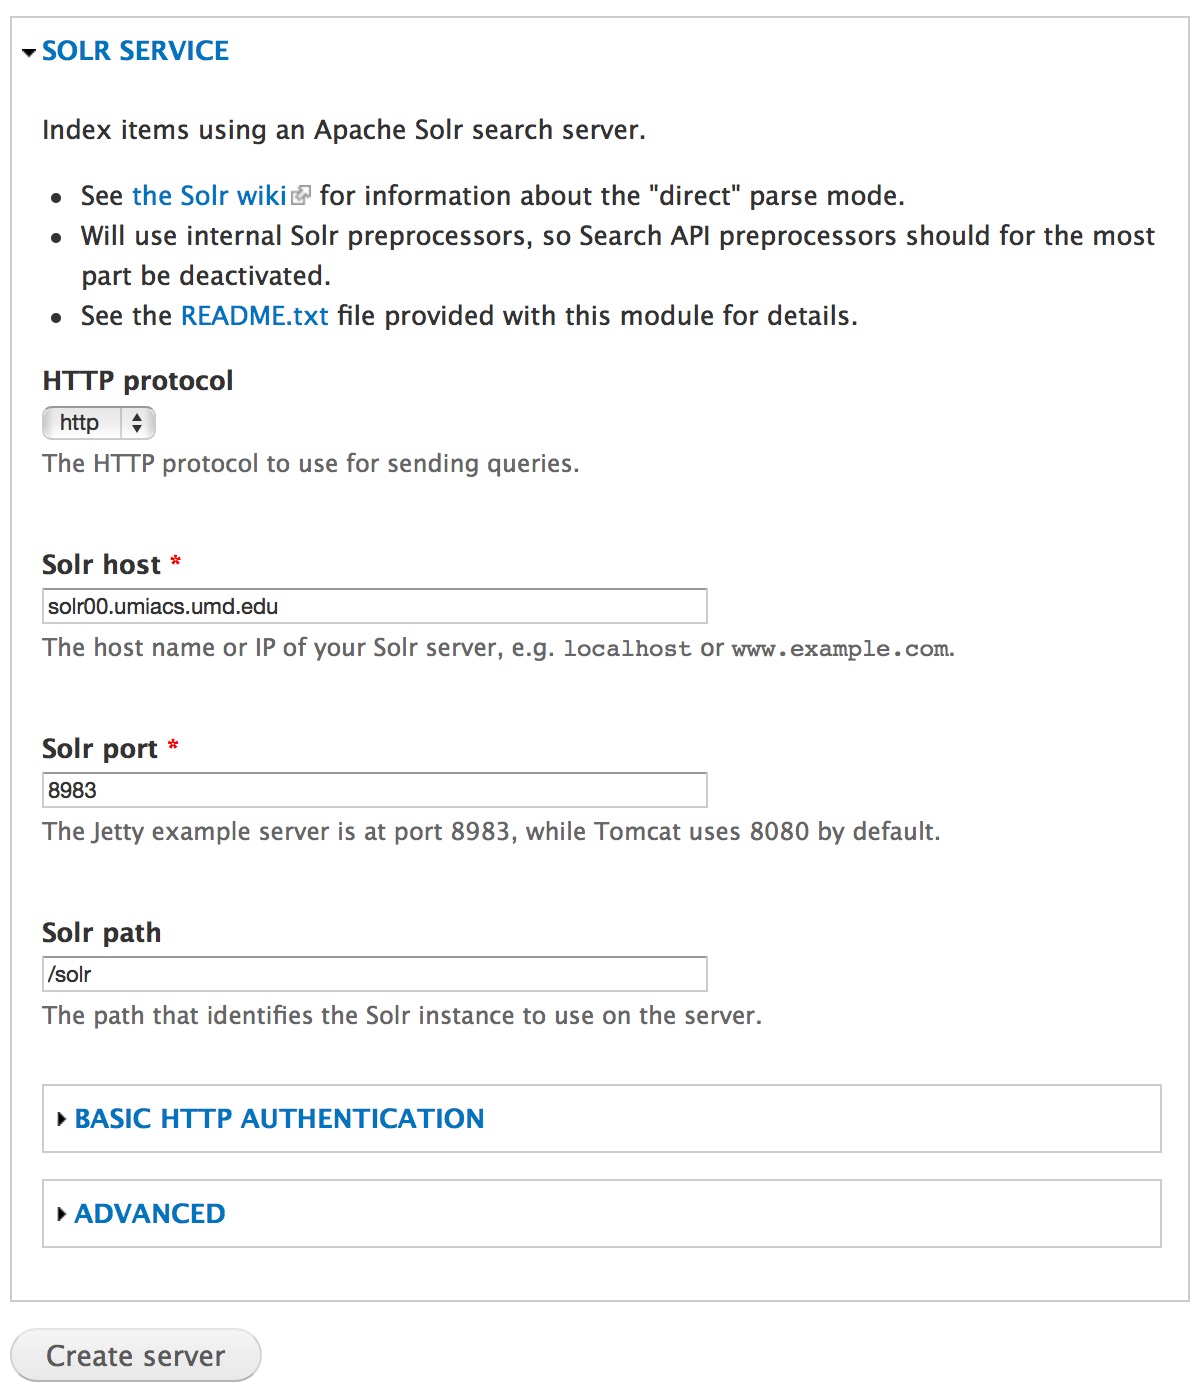
Once you select the "Solr service" service class, you will get the following configuration options:
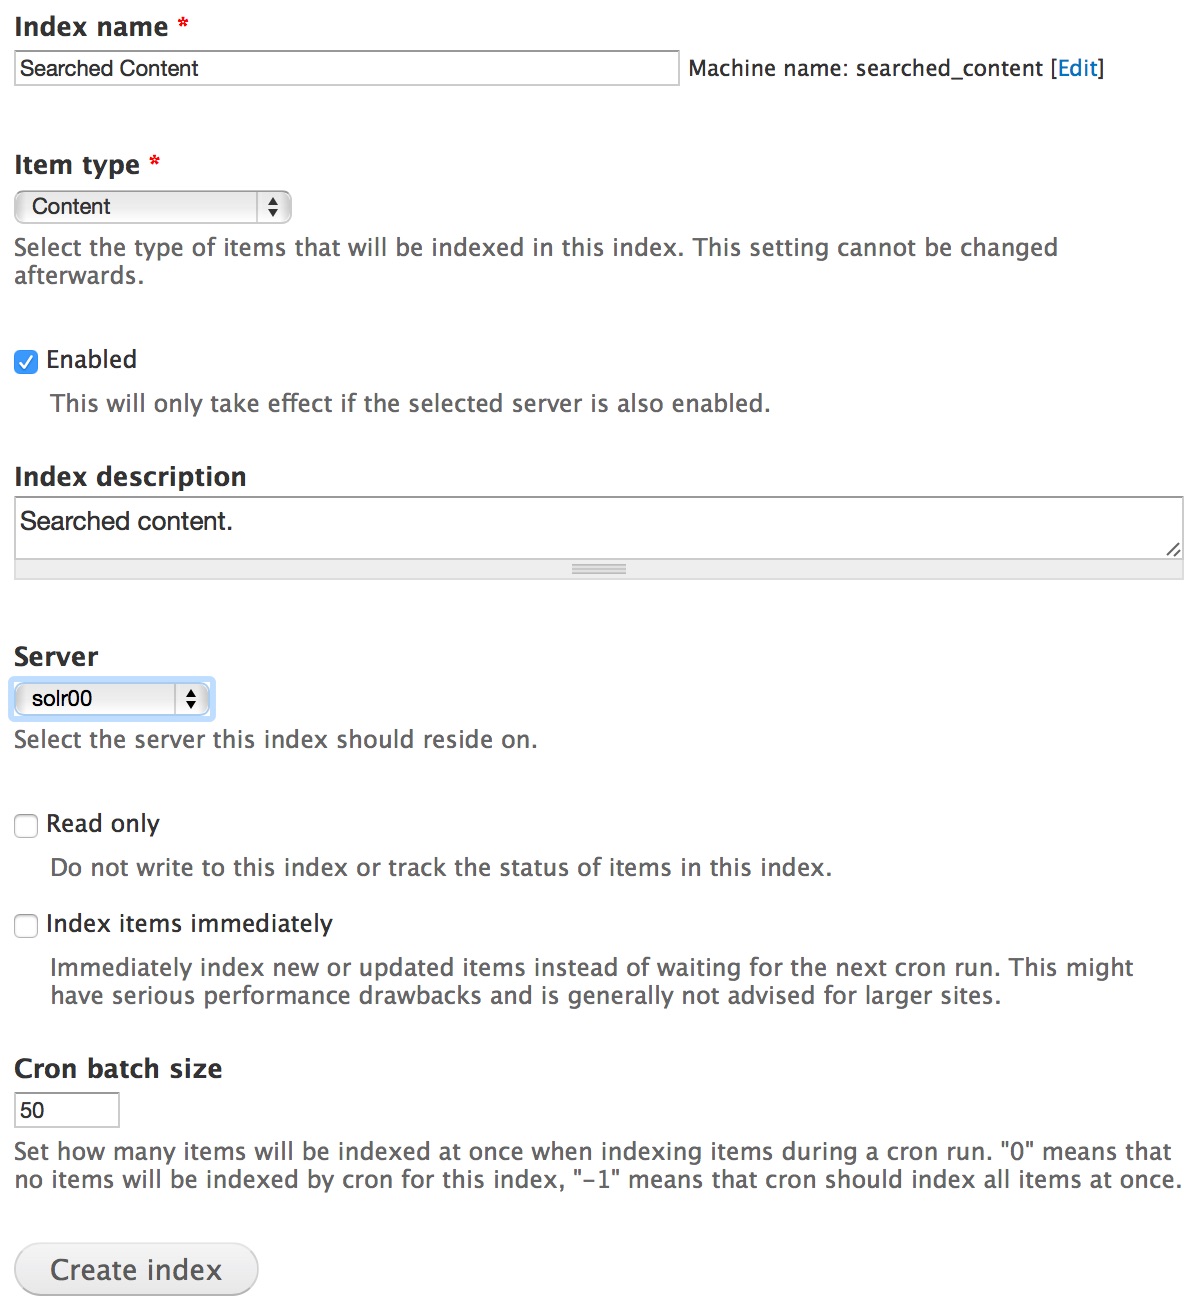
Set up an Index
Once you've created a server, it's time to add an index or two.
Next, we'll select the fields to index. Choices here will vary depending on the search needs of your particular site, but "Title", and "Body text" are good defaults at a minimum. Any fields available across the item type selected are available.
After checking off a checkmark for a field you want to index, the type should almost always stay as it is. If you want to give a certain field precedence, increase its "Boost" value. I'm going to make the title more important as a search term. Note that you can only boost fulltext fields.
When you're done selecting fields that should be indexed, save and proceed to define data alterations and processors.
Note Most of the alterations and processors will only work if the Solr configuration files provided along with the Search API Solr Search module were set up correctly.
Read through all the different options. I highly reccommend most people exclude unublished nodes:

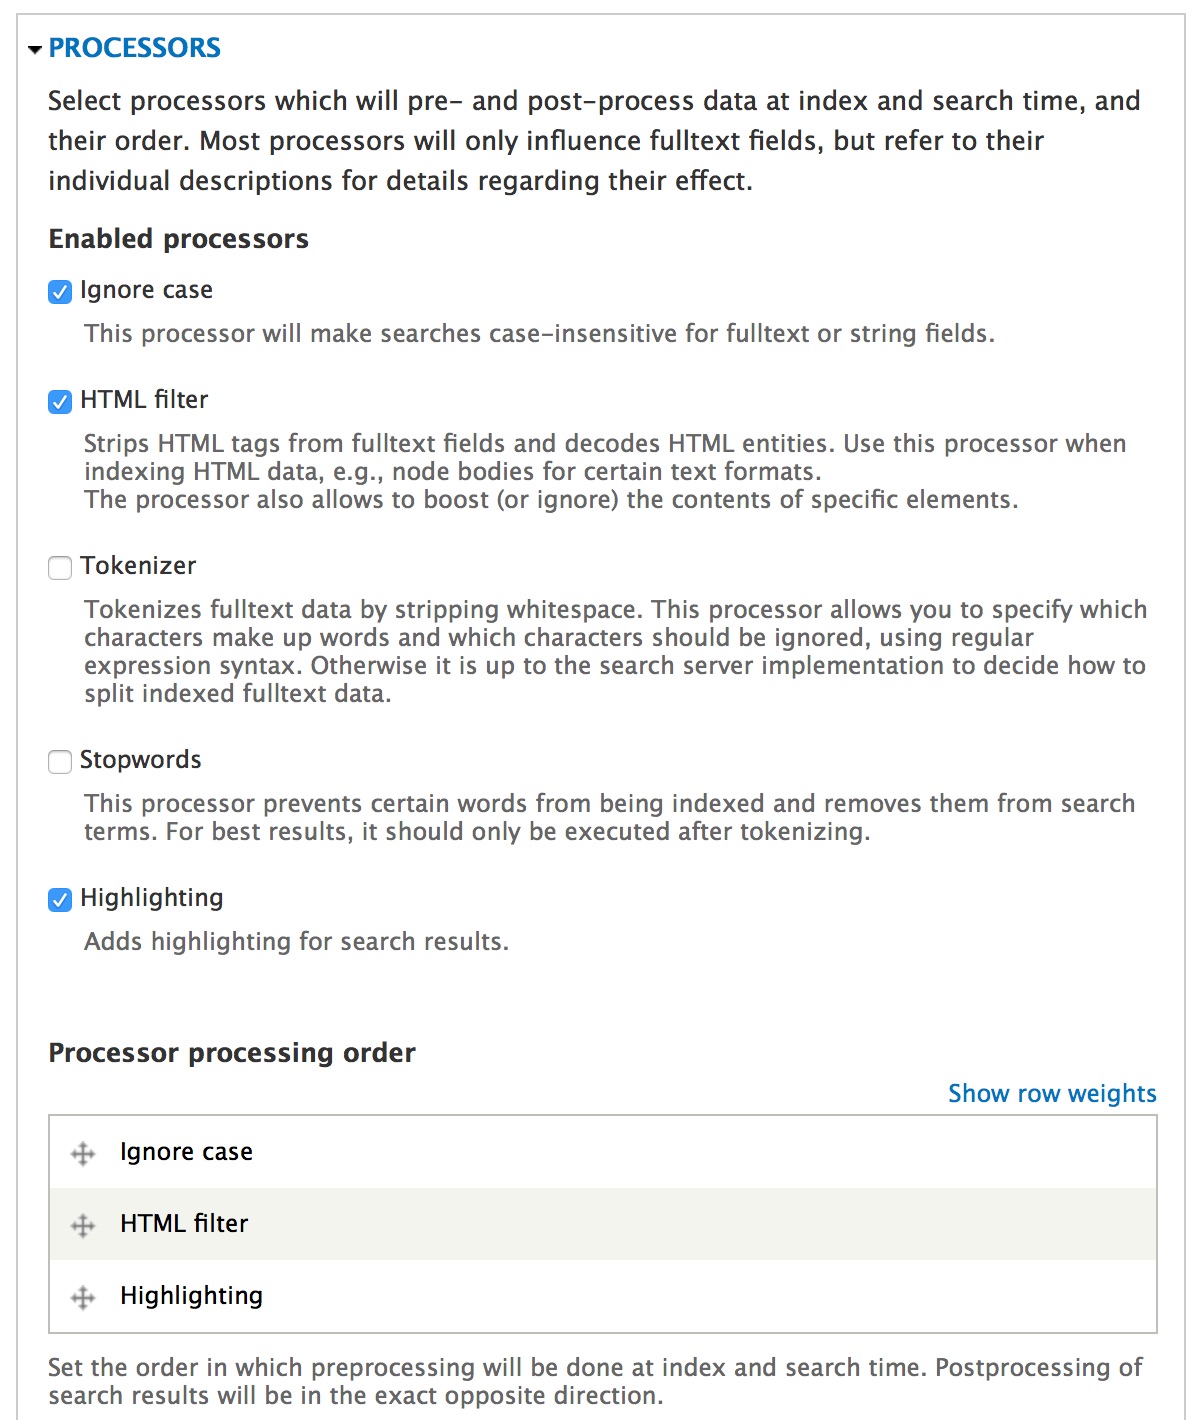
Enable appropriate processors to your heart's content:
After saving the configuration, you will have successfully added a search index. You may wish to add another index for additional item types that need to be indexed.
Creating a search page view
We want to be able to combine multiple indexes into a unified search page in this section.
Go to create a new view. Give it a descriptive name and show "Multi-index search."
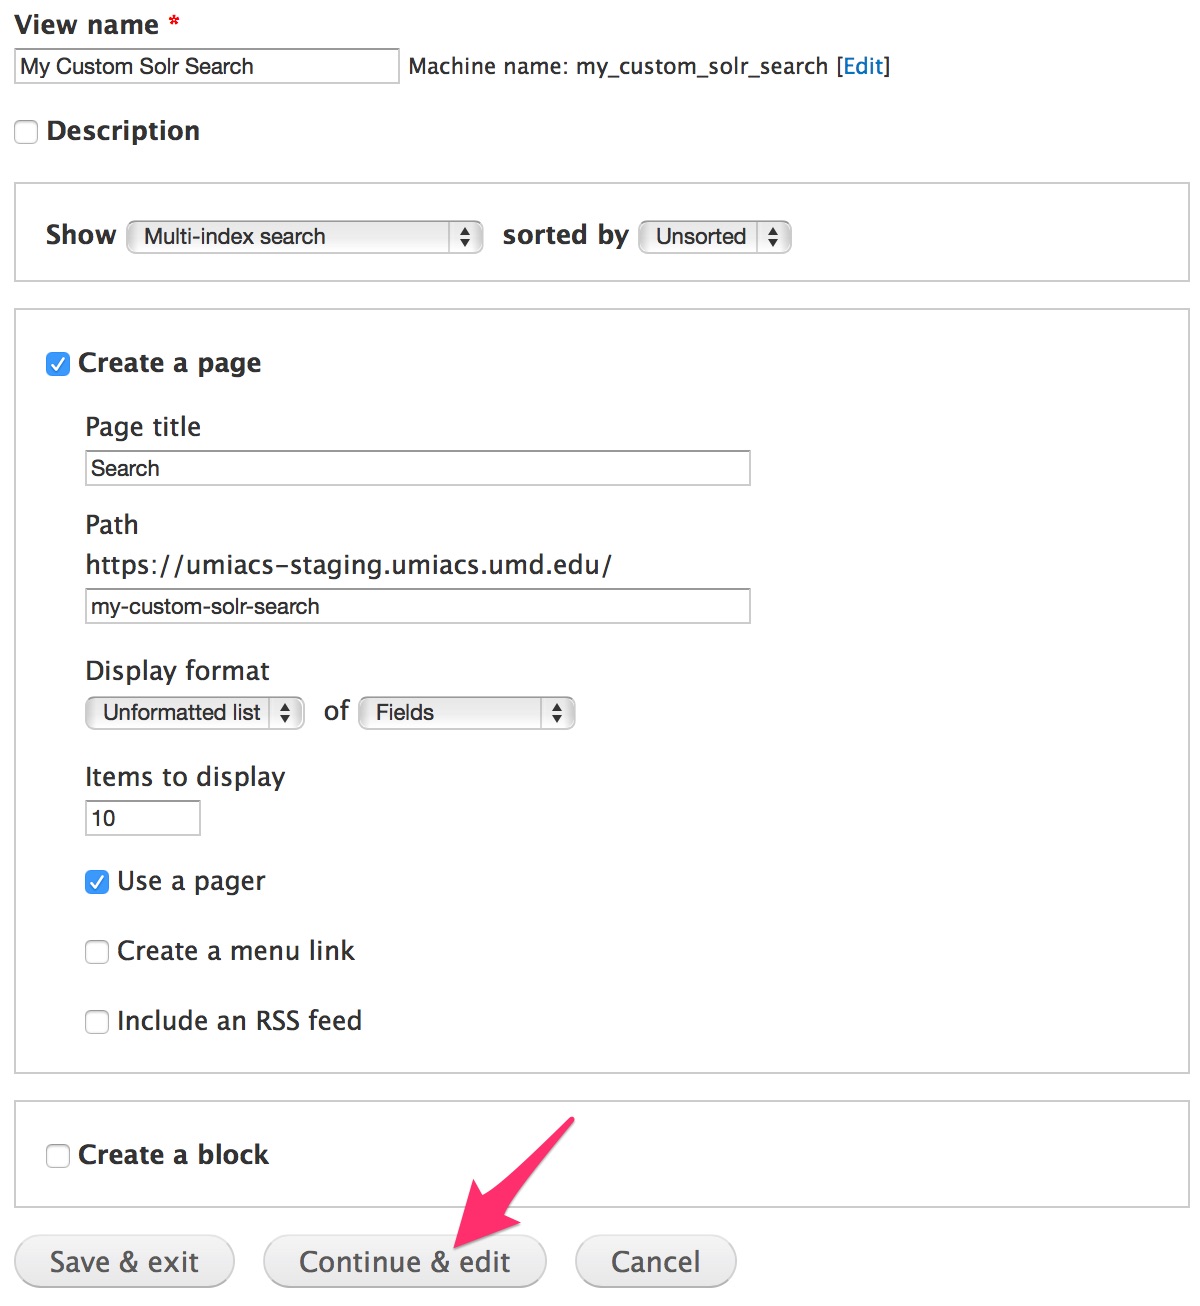
Add fields, filter criteria, and sort criteria.
Fields
With two different indexes, I added the fields that I'd like to show from both indexes. For each result returned, the fields corresponding only to the type of the result will be displayed. For example, when the search result being iterated over came from the "Searchable Profiles" index, only the "Searchable Profile" fields will be rendered, while the "Searchable Content" fields will be skipped.
Exposed form
Under "Advanced," I put my exposed form in a block so that I can choose where to place the search form through the blocks layout system. For 'exposed form style,' I changed the form to "Input required" so that no results are shown until a search term is entered. Otherwise, the search page will show every result by default.
Wrap-up
That's really all there is to it to the view configuration. My view configuration now looks like this from the top level:
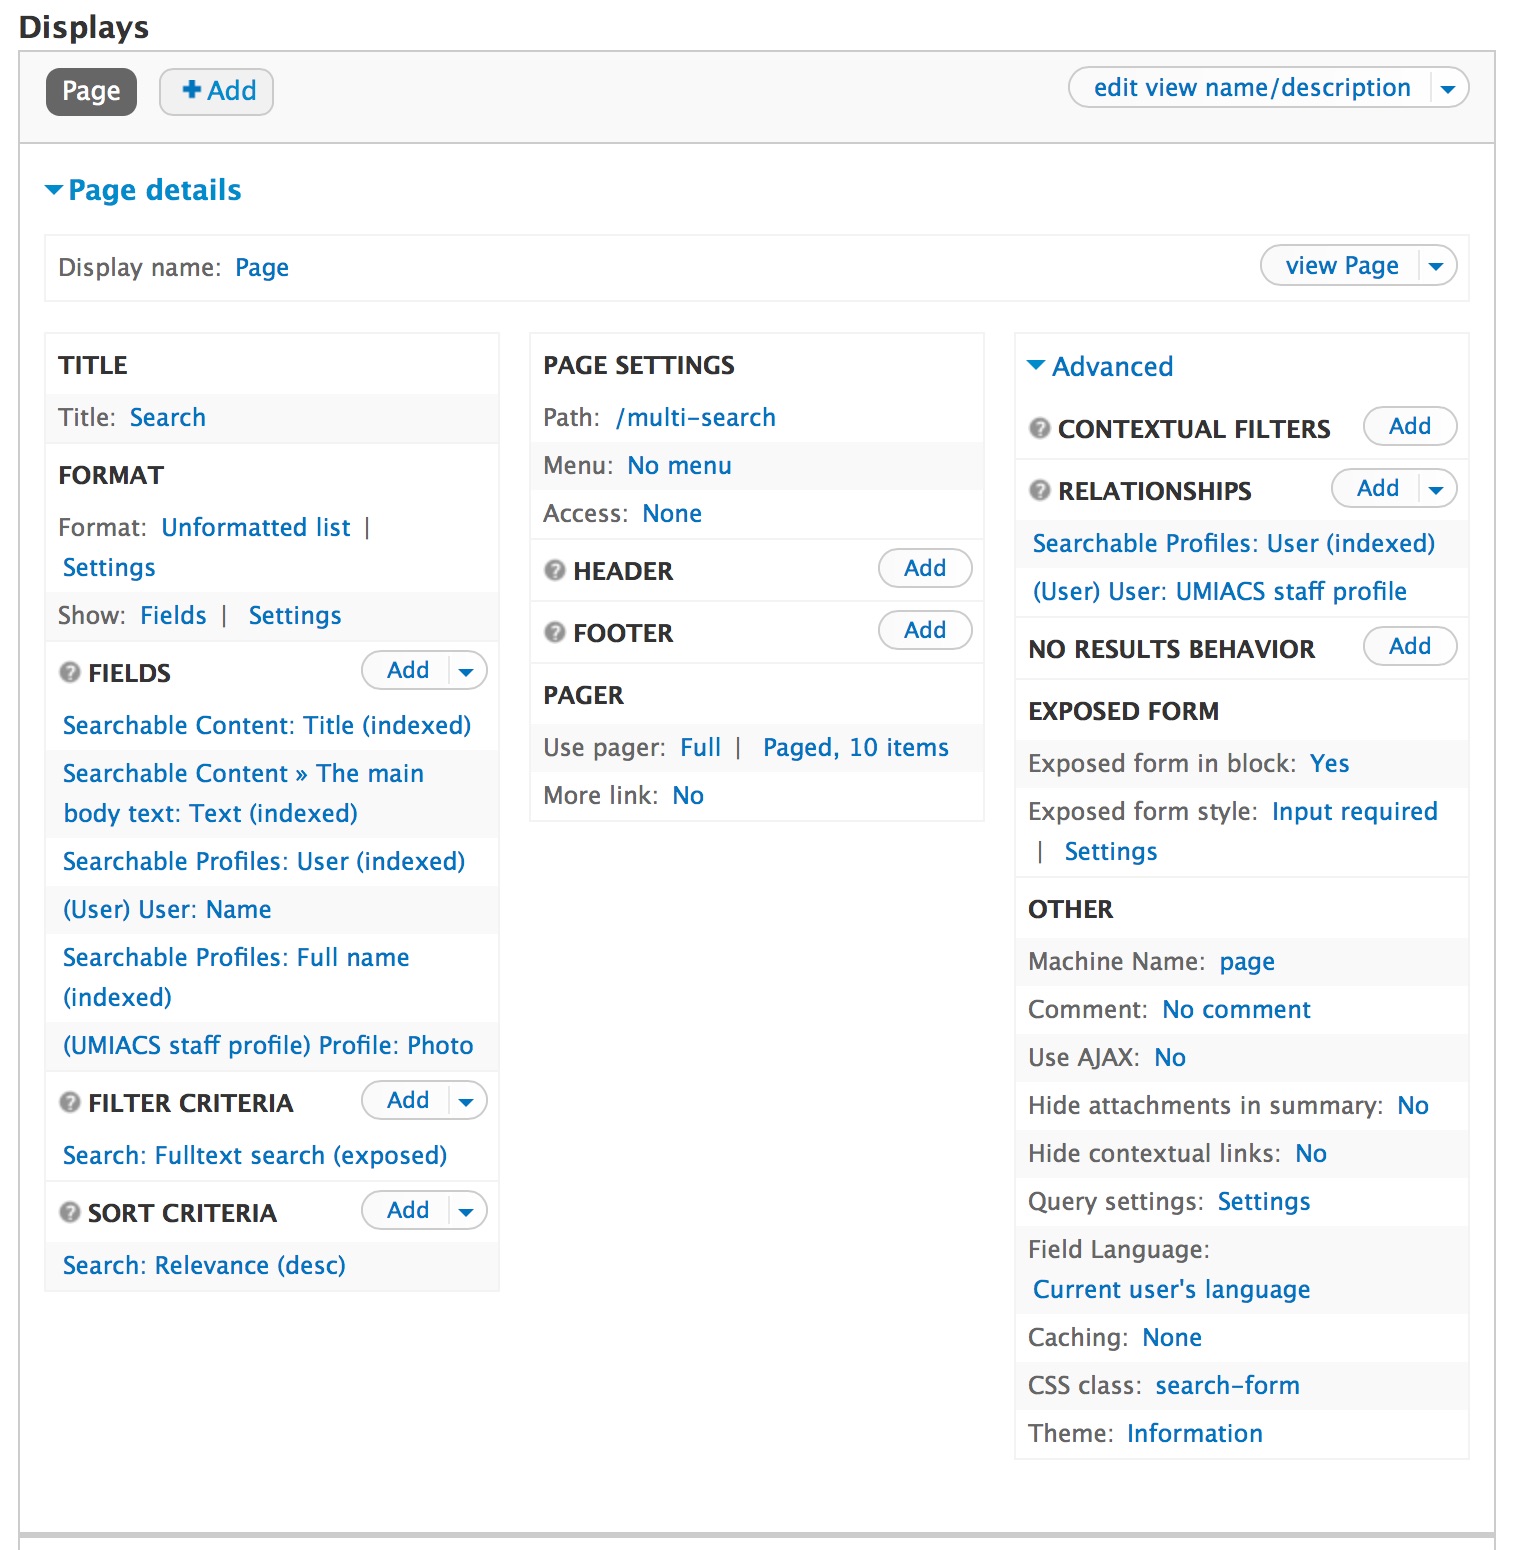
I've included an export of my view as well. Even though it can't be used "as-is" because the machine names that it references are not relevant, it might still be of some additional guidance while setting up a view of your own. Here is the link.